Masonry heaters have been around for a long time. They date back to the 1800s in Europe and North America where they were typically made of brick or stone with a firebox in the center. They work by burning wood at one end which heats up an enclosure on the other side that is filled with bricks. As these bricks heat up, they release energy through their cracks and pores into the surrounding air. These masonry heaters are still used today but there are many differences from when they were first introduced over 200 years ago!
What is a masonry heater?
Masonry heaters, or masonry stoves, are kind of like fireplaces…but better. Built as large thermal masses (often 30,000 pounds!) of brick or stone, they absorb heat from a fire. After the fire goes out, the masonry slowly radiates the absorbed heat back into the room over a period of time.
They accomplish this feat by channeling the smoke from the fire through a series of chambers. As the smoke travels, the masonry absorbs the heat. By the time the smoke leaves the house through the chimney, most of the heat has been absorbed, thus making masonry heaters highly efficient.
In a typical fireplace or woodstove, the hot smoke exits the house almost immediately, taking all that nice heat out into the cold rather than staying in the house.
What is the history of masonry heaters?
Archaeologists have discovered evidence of masonry heater technology dating over 7000 years ago in places like China, Germany, Russia, and even Kenya.
In China, they were called Kang beds. They began simply by building a fire on a clay floor. When the fire was put out and the ashes removed, the inhabitants slept on the warm floor. This system evolved to the smoke being channeled through clay ducts under platforms.
Romans used similar technology in their hypocaust systems. Smokes passed through chambers built from brick under the floor and created the first radiant floor system. This same process was used to heat water for the Roman baths.
Some historians argue that environmental conditions in medieval Europe promoted masonry heater technology. A period of cold winters and decreasing wood supply forced people to find more efficient ways to stay warm.
In Russia, masonry heaters are often literally the center of the home. One side faces the kitchen, the other the family room, and they’re often big enough to sleep on. They are usually tiled. Because of their common usage, people often refer to masonry heaters as “Russian fireplaces.”
Russians were not the only Europeans to use masonry heaters, however. The Germans, Finns, and other Northern European people relied on radiant technology to survive long and cold winters.
How does a masonry heater work?
Masonry heaters work using radiant heat concepts. A wood fire (at high temperatures!) heats up a masonry mass. Even after the wood has burned, however, the thermal mass continues to give off residual heat…often keeping the temperature warm for a long period of time.
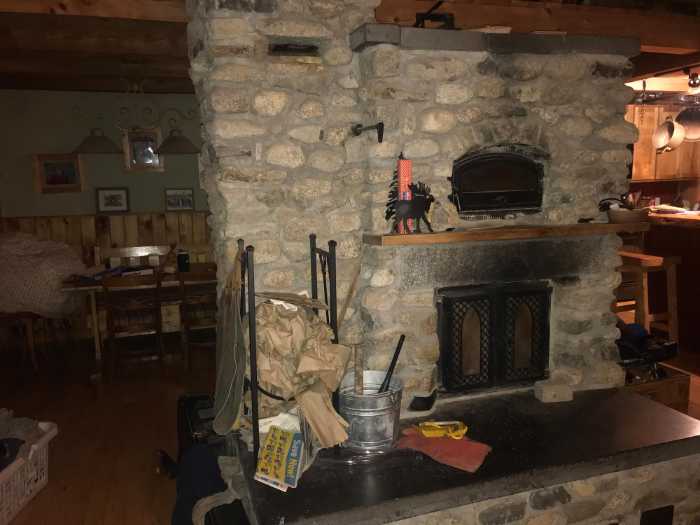
Masonry heaters have a foundation, firebox, cold air intake, a circulation system, a damper, a bypass valve, and, often, an oven (or secondary combustion chamber) and a veneer.
A 3000-pound masonry heater and a masonry chimney need a solid foundation to sit on. These foundations are made from cement blocks starting on the basement floor and are built up through the floor framing.
Masonry heaters can be broken down into the core and the veneer. The core is the inside workings…the firebrick, the smoke channels, dampers, etc.
The veneer is the outside “skin.” Veneers can be made from brick, fieldstone, tile, soapstone, marble, or really any kind of stone mass that captures the style and look you want.
A typical masonry heater often pipes in cold air from the outside…partially for safety and partially for efficiency. Rather than burn up oxygen from the living space, the heater pulls in cold exterior air through a pipe. Since cold air has more oxygen than warm air, it feeds the fire better.
The firebox is built from refractory bricks and refractory cement which can withstand temperatures up to 2000 degrees Fahrenheit. Usually, the firebox is then insulated with an insulation like mineral wool around its outside to give it room to expand, then another layer of masonry is built around it to provide thermal mass for absorbing heat.
This cold air intake also has some sort of air governing system that allows you to control the amount of air to the fire. To start the fire you often open it up to allow maximum airflow but then reduce it to keep the fire from burning too fast.
In order to maximize heat absorption, masonry heaters use a series of channels and chambers that act as heat exchangers. As the smoke moves from the firebox to the chimney, masonry material like brick and stone works as a heat exchanger…the “energy” becomes “stored heat.”
By the time the smoke reaches the top of the chimney and exits the house, most of its heat has transferred to the stones which, in turn, radiate heat back into the house.
The damper, usually located in the flue, controls the amount of air exiting the masonry heater. Airflow is necessary for efficient burns. Thus, while the fire is burning the damper is kept open to allow smoke to escape up the chimney. Once the fire has gone out, however, you close the damper to keep the heat inside.

Since smoke needs to meander its way around heat exchange chambers in a masonry heater, it needs “encouragement” to make it up the chimney and out of the house. When the system is warm, this is no problem. Heat rises so the warm masonry creates a suction that drafts the smoke up.
When the heater is cold, however, it’s tougher to create that draw. Thus, masonry heaters usually have a bypass valve which is simply a lever that opens a path directly from the firebox to the chimney. Once the masonry has warmed, you shut the bypass valve and allow the smoke to pass through the entire system.
Masonry heaters often employ a secondary combustion chamber (which sometimes doubles as a bake oven!) outside of the firebox which further increases efficiency. Smoke from the firebox contains unburned flue gases, which, in a traditional wood stove or fireplace go up the chimney unutilized. In a masonry heater, however, they dump into a secondary chamber where the heat ignites the gasses.
Masonry heater cores are covered with a veneer…or a layer of masonry that isn’t necessarily structural but does provide thermal mass and visual appeal. You can use regular brick for that classic look, fieldstone for a farmhouse feel, soapstone for a touch of elegance, or other natural masonry material that will radiate the heat produced by the wood burned.
Many masonry heaters have bake ovens to complete that feeling of soothing warmth! I should note that if your bake oven functions as a secondary combustion chamber (meaning your smoke actually passes through it, then you have to contend with ash…AND, it’s usually too hot to use while the fire is burning. You have to wait until the fire has burned out to cook that pizza!
And, to complete the parts, masonry heaters often have glass doors to the firebox and clean-out access points to the chambers to get rid of ashes and soot.
Some masonry heater builders recommend cast iron doors glass doors because of their durability. The high temperature of a wood fired heater can degrade even fireplace glass over time. But, it’s tough to see a nice fire through a cast iron door, so we went with a glass one anyway. And it’s held up well over the last 12 years!
Locating a Masonry Heater in Your Home
To operate most efficiently, masonry heaters are often located in the center of the house. That way, heat isn’t radiated to the outside if it were located against an exterior wall. Like traditional Russian models, many heaters have an oven on the kitchen side and doors on the living room side.
How much wood does a Masonry Heater burn?
Unlike wood stoves, masonry heaters can’t withstand constantly burning fires. The masonry would absorb too much heat and crack. These heaters host one or two fires a day, absorb heat from those fires and continue to radiate them for many hours. Thus, they use significantly less wood than other wood burners.
Our 1200 square foot house has R40 insulation in the roof and R30 insulation in the walls. We also have a passive solar design, (lots of windows in the south!), and an open concept: there are no walls between the living room, dining room, and kitchen, and the bedrooms are set off to the north side of the house.
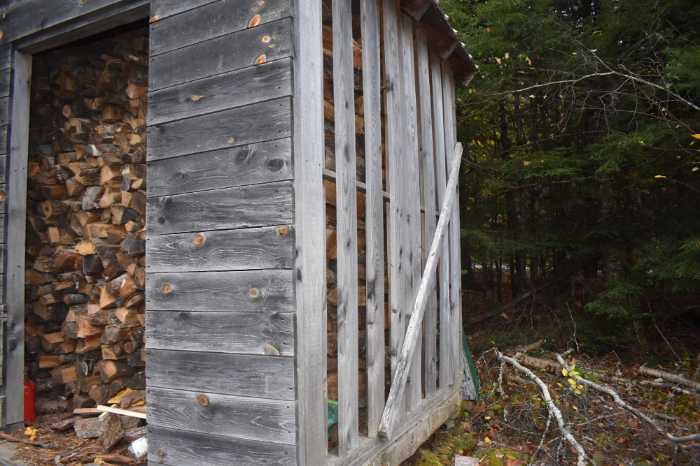
With that design, we heat our entire. house with the masonry heater and burn only four cords of wood over a winter. When I was a kid living in an old farmhouse with two woodstoves we burned 10 cords each winter!
Building a Masonry Heater
From Scratch
It’s certainly possible to build your own masonry heater from scratch. But, unless you have significant experience with masonry work it would present quite a challenge. Not only is there the challenge of cutting and laying brick, but you also have to create a 3-dimensional object from a 2-dimensional plan.
Plans
I would find it tough to build a masonry fireplace just from plans. Good plans are hard to find. And, since masonry heating relies so much on the intricate heat exchanger properties of all the channels, it’s tough to visualize the finished product from a piece of paper.
Kits
If you want to tackle a masonry heater project yourself, a kit would be a great way to go. You would want to have some working knowledge of how to mix mortar and lay brick or stone.
Masonry heater kits come with varying degrees of “completeness.” This isn’t to say that some are shoddy, it’s just a reflection of how much you want. Most kits come with the essentials like cast core pieces that make the chambers, the fire grates, dampers, doors, etc. Often, a homeowner will purchase more common materials like brick, cement, or even veneers like common brick, tile, or soapstone on their own. Getting these parts of the masonry heater on your own can save in shipping costs.
These kits come with plans. With most masonry heater kits, the parts are labeled and go together a lot like legos…but with refractory cement!
Hire a pro
Of course, you can always hire a pro. And the advantages and disadvantages are obvious: you don’t have to stress about getting it right because these guys build ’em every day. But…you’re paying for the service.
One less obvious way to cut costs is to offer to “tend” for your lead masonry heater mason. In this scenario, you carry brick, mix mortar, cut brick, and generally do all those side things so that the mason can focus on putting it all together. This is a great way to be involved, to learn the process, but not feel like you’re on your own.
Pros and Cons of a Masonry Heater
Like anything, there are trade-offs to masonry heaters.
Pros
- Masonry heaters are incredibly efficient. Not only do they operate at high heat that completely burns all the wood and the secondary gasses generated in the primary burn.
- In addition, the stone mass absorbs heat from the wood burning. It then radiates the heat out to the dwelling rather than simply escaping up the chimney like in fireplaces or wood stoves.
- You use less wood! You don’t have to keep loading firewood into a masonry heater like you do a fireplace or woodstove. You simply load up the firebox, light it, adjust airflow, then let it go.
- Power outages. Even if the power goes out…you’ll still be warm!
- They’re beautiful. The aesthetics can range from intricate stonework to marble, to soapstone, to a tile stove that can be a work of art.
Cons
- A masonry heater is expensive. Just the materials can be close to $6000. Having a mason come and build it can cost closer to $30,000.
- They’re big. Thermal mass takes up space. In order to store that much heat, you need 30,000 pounds or so of rock sitting in your living room.
- Temperature regulation. With a furnace, you can simply turn a thermostat up or down. With a wood stove, you can cut off the air supply and let the fire smolder. With a masonry heater, you have to light a fire…and wait. (It can often take a few DAYS for a masonry heater to get up to optimal operating temperature). And since you can’t keep fires going indefinitely, on those really cold days and nights, you’re limited to two fires. On those days, we can’t get our house much warmer than 60 degrees Fahrenheit.
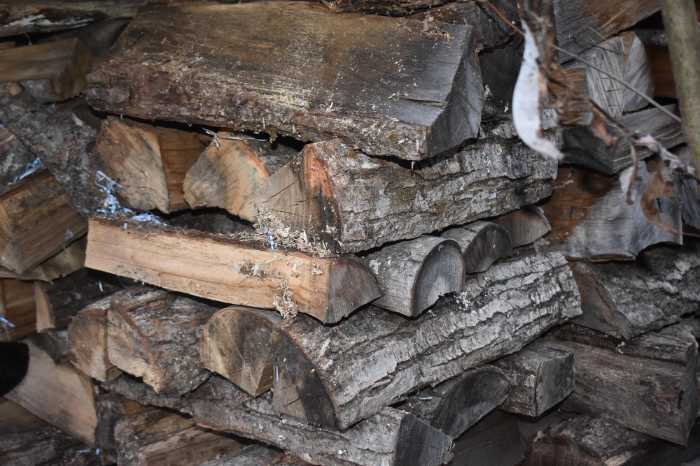
- Masonry Heaters require DRY wood. This may or not be a “con” since any firewood should really be seasoned. However, it’s even more critical for masonry heating. With a wood stove or a fireplace, the smoke goes pretty much straight up the chimney, making cleaning pretty straightforward. With masonry heating, however, smoke circles around a series of chambers. You want dry wood to burn fast and hot to avoid the build-up of creosote in the chambers which, if ignited, could damage the heater or even start a house fire. So get the wood dry before heating season!
- You have to be there. You can’t set a thermostat, leave for several days and return to a warm house. (You can pay the neighbor’s kid to come over and light a few fires while you’re visiting your mother-in-law in Florida!) But for us, this is the biggest drawback. And furthermore, you can’t just crank up a roaring fire in a cold masonry heater…it will crack the bricks. You need to start with small fires, less heat, and gradually warm the stones up to where they can handle more heat.
A Final Word on Masonry Heaters
Masonry heaters are an investment! But they can pay for themselves if you have a reliable wood source. The Efficiency Maine website estimates that it would cost $2100 a season to heat a home with oil. Since I have access to a woodlot, heating costs only a few dollars in chain saw gas and oil and several hours of cutting, splitting and, stacking.
And there’s just something about a wood burning home. It smells good, it looks warm and inviting, and the radiant heat spreads evenly throughout the house. I often plan my winter lounging activities around the burn where I can put on my slippers and warm my toes by the fire!
I used a wood stove for years, and when I built my latest house we debated about the expense of a masonry heater.
But for us, it’s been worth it!
